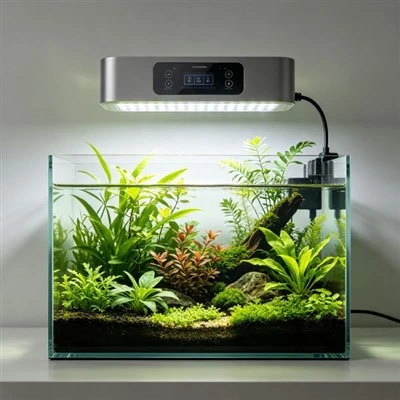
Mounting a Light on a Rounded Aquarium Rim
Mounting a Light on a Rounded Aquarium Rim begins with a bow-front or moulded-rim tank. The relevant physical or operational link is that flat clamps may contact only a small area and can twist under load. This does not mean every visible change comes from the lamp. It means the stated link is the first cause worth checking under controlled conditions. Describe what a person can see, when it occurs, and what changed recently. Keep conclusions proportional to the evidence, especially when plants, corals, fish behaviour, electrical safety, or product performance are involved.
The mounting system deserves the same attention as light output. Confirm the allowed glass or rim thickness, bracket orientation, fastener condition, cable load, and clearance for lids and maintenance. Cord weight should not pull the fixture sideways. In a bow-front or moulded-rim tank, perform a dry service rehearsal with power disconnected: open the lid, reach the filter, feed the tank, and remove the light as instructed. A bright fixture with an unstable or obstructive mount is not a successful installation. Here, that point helps evaluate the documented mechanism: flat clamps may contact only a small area and can twist under load.
The first observation for this case is specific: inspect the bracket footprint from above and the side. Make that observation before opening an app or moving the fixture. Note the clock time, room light, water condition, current programme, mounting position, and any recent cleaning or equipment change. A fixed photograph may support the notes when exposure and position remain constant. The objective is a reliable starting point that another person could recognise, not a dramatic before image.
Household routine is part of the installation. Feeding, school, work, cleaning, sleep, and travel determine when people observe the aquarium and when accidental overrides occur. For mounting a light on a rounded aquarium rim, choose a schedule that a second person can understand and recover. Label only the controls they may need, store the manual nearby, and write the normal on and off times. Simplicity is valuable when it prevents a temporary viewing change from running all night or a disconnected timer from going unnoticed. For this scenario, the key observation is to inspect the bracket footprint from above and the side.
Use this controlled check: test fit without water exposure and follow the specified glass or rim range. Change no other major variable during the comparison. If measurement equipment is involved, record its model, orientation, position, and whether it is designed or corrected for underwater use. If the test depends on human viewing, use the normal seat or working position rather than an ideal angle chosen for the test. Repeat the result before accepting it as the explanation for mounting a light on a rounded aquarium rim.
Compare alternatives with the same question and conditions. Carry out the stated check: test fit without water exposure and follow the specified glass or rim range. Keep the fixture, room, camera or meter, and observation point unchanged. If two products must be compared, match mounting geometry and document power and settings separately. Do not rank them from percentage values alone. Summarise the result in terms of the original purpose: visibility, coverage, control reliability, service access, or a measured quantity. This keeps mounting a light on a rounded aquarium rim tied to a real decision instead of a collection of attractive numbers. The controlled check remains practical: test fit without water exposure and follow the specified glass or rim range.
The practical response is to use the correct adapter or a different approved mount. Apply it in the smallest reversible step that can answer the question. A viewing or control issue may become clear in minutes, while biological responses require appropriate time and species-specific interpretation. Avoid increasing intensity simply because the first change was subtle. Large simultaneous adjustments erase the baseline and can create a new problem that looks like confirmation of the old one.
Maintenance can change delivered light without any electronic adjustment. Dust on a heat sink, salt on a lens, mineral film on a cover, or a shifted bracket may develop slowly enough to escape notice. For mounting a light on a rounded aquarium rim, inspect the cool, disconnected fixture from several angles. Use non-abrasive materials approved for the optical surface. Photograph deposits or corrosion before cleaning when a warranty question is possible. After reassembly, verify that mounts, cables, covers, and ventilation have returned to their intended positions. Any adjustment should support the decision to use the correct adapter or a different approved mount.
One limit must remain visible throughout the process: do not force a clamp to fit a profile it was not designed for. Check the manual for the exact model, and keep plugs, adapters, external connectors, vents, and mounts in their intended environment. Disconnect equipment before cleaning or mechanical inspection. When damage, liquid entry, unstable mounting, unusual odour, or severe heat is present, stop the experiment and seek manufacturer or qualified electrical support.
A support request about mounting a light on a rounded aquarium rim should make the fault reproducible. Provide the model, serial or batch information, purchase date, controller and firmware details, clear photographs, and a numbered sequence that produces the observation. State what was expected and what happened instead. Include test fit without water exposure and follow the specified glass or rim range as the controlled comparison. Avoid opening sealed housings or making unapproved repairs before the supplier responds. Good evidence helps separate product failure, compatibility, installation, and misunderstanding of the controls. The stated limit also applies: do not force a clamp to fit a profile it was not designed for.
A short written result closes the loop. Use the title Mounting a Light on a Rounded Aquarium Rim in the log, followed by the starting condition, the controlled change, the observation period, and the outcome. State whether the result was measured, photographed, or judged by eye. If the explanation remains uncertain, restore the known stable arrangement and test another cause later. This record prevents the same question from being answered with a different guess each time it appears.
Electrical safety takes priority over completing a lighting experiment. Keep plugs, power strips, and adapters away from splash and leak zones, provide a stable drip loop where appropriate, and follow local requirements for ground-fault protection. Never handle energised equipment while standing in water or with wet hands. For mounting a light on a rounded aquarium rim, do not force a clamp to fit a profile it was not designed for. Damaged insulation, exposed conductors, unusual smell, severe heat, arcing, or repeated protective-device trips require disconnection and qualified assessment. This evidence belongs in the written record for Mounting a Light on a Rounded Aquarium Rim.